No Sound After a Windows Update: The Five-Minute Audio Fix
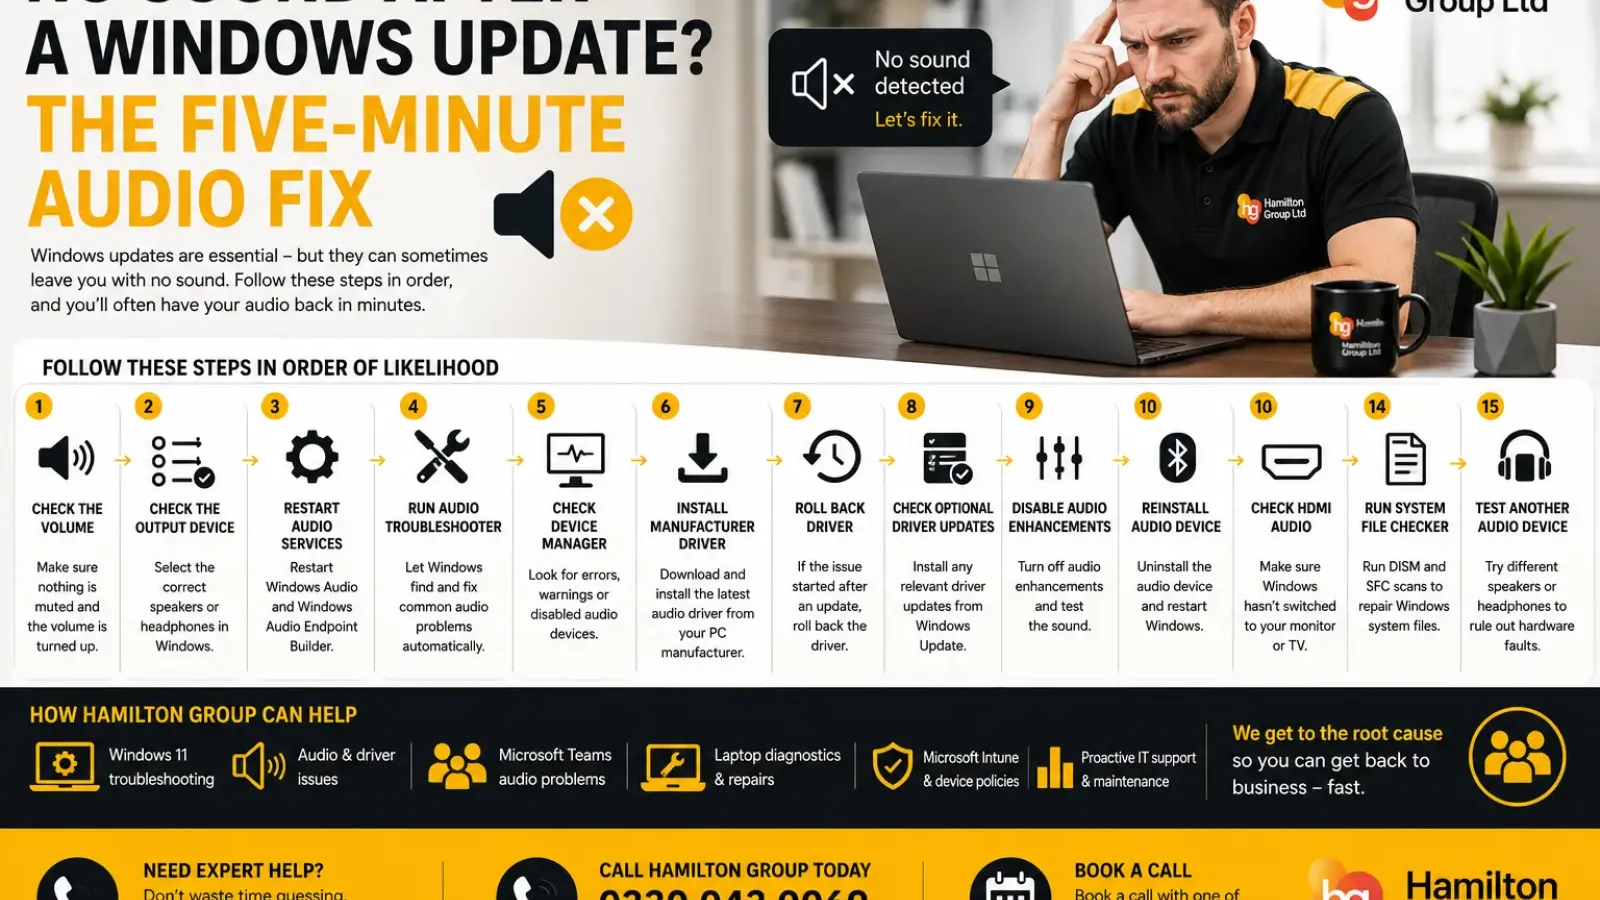
Windows updates are essential for keeping your PC secure and performing at its best. However, it’s not uncommon for an update to unexpectedly affect your audio. One minute your speakers or headphones are working perfectly, and the next you’re greeted with complete silence.
Fortunately, most post-update sound problems can be fixed in just a few minutes. In many cases, the issue is caused by a driver change, an incorrect playback device or a Windows setting that has been reset during the update.
Follow these steps in order, and you’ll often have your sound back before you’ve finished your morning coffee.
Why Does Sound Stop Working After a Windows Update?
A Windows update can affect your audio for several reasons, including:
- Audio drivers being replaced with generic Microsoft versions
- The default playback device changing
- HDMI or DisplayPort audio becoming the default output
- Bluetooth devices disconnecting
- Audio services failing to restart correctly
- Third-party audio software becoming incompatible
- Corrupted driver installations
- Optional driver updates waiting to be installed
The good news is that most of these issues are simple to fix.
Step 1: Check the Volume (Yes, Really!)
It sounds obvious, but it’s always worth checking the basics first.
Make sure:
- Windows isn’t muted
- Your speakers or headphones are switched on
- External speakers have power
- Volume is turned up on both Windows and the device
- Any inline headphone controls aren’t muted
Click the speaker icon on the taskbar and confirm the volume slider is above zero.
If you use external speakers, check their own volume controls too.
Step 2: Make Sure Windows Is Using the Correct Output Device
This is by far the most common issue after a Windows update.
Windows may suddenly decide your monitor, TV, USB headset or HDMI connection is now the preferred audio device.
To check:
- Click the speaker icon on the taskbar.
- Select the audio output arrow.
- Review the list of available devices.
- Choose your actual speakers or headphones.
For example, you may see:
- Speakers (Realtek Audio)
- Headphones
- USB Audio Device
- NVIDIA High Definition Audio
- AMD HDMI Audio
- Dell Monitor
- Bluetooth Headphones
Simply selecting the correct device often restores sound instantly.
Step 3: Restart Windows Audio Services
Sometimes the Windows Audio service doesn’t restart correctly after an update.
Press:
Windows + R
Type:
services.msc
Locate:
- Windows Audio
- Windows Audio Endpoint Builder
Both services should show Running.
If they don’t:
- Right-click the service.
- Select Restart.
- Wait a few seconds.
- Test the audio again.
Step 4: Run the Audio Troubleshooter
Windows 11 includes a built-in audio troubleshooter that can detect common issues automatically.
Go to:
Settings → System → Troubleshoot → Other troubleshooters
Run:
Playing Audio
The troubleshooter checks:
- Audio services
- Playback devices
- Driver issues
- Device configuration
- Muted outputs
- Common software problems
Although it won’t fix every issue, it’s a quick step that’s worth trying.
Step 5: Check Device Manager
If Windows cannot communicate properly with your sound hardware, Device Manager usually reveals the problem.
Right-click Start
Choose:
Device Manager
Expand:
Sound, video and game controllers
Look for:
- Yellow warning symbols
- Unknown devices
- Disabled devices
- Missing sound hardware
Common entries include:
- Realtek Audio
- Intel Smart Sound Technology
- NVIDIA High Definition Audio
- AMD High Definition Audio
- USB Audio Device
If you see a warning icon, right-click the device and choose Update driver.
Step 6: Install the Manufacturer’s Audio Driver
Windows Update sometimes installs a generic audio driver that lacks the features your laptop or PC requires.
Instead, visit your computer manufacturer’s support website.
Examples include:
- Dell
- HP
- Lenovo
- ASUS
- Acer
- MSI
- Microsoft Surface
Download the latest audio driver specifically for your device model.
For many laptops, this alone completely resolves post-update sound problems.
Step 7: Roll Back the Driver
Did the sound disappear immediately after Windows installed an audio driver?
Try rolling it back.
In Device Manager:
- Double-click the audio device.
- Select the Driver tab.
- Click Roll Back Driver (if available).
- Restart your PC.
If Windows kept the previous driver, this can restore audio in under two minutes.
Step 8: Check Optional Driver Updates
Some manufacturer drivers are no longer installed automatically.
Go to:
Settings → Windows Update → Advanced options → Optional updates
Look under:
Driver Updates
You may find updates for:
- Realtek
- Intel Smart Sound Technology
- Conexant
- Cirrus Logic
- Nahimic
- Dolby components
Install any relevant updates before testing again.
Step 9: Disable Audio Enhancements
Occasionally, audio enhancements become corrupted after an update.
Go to:
Settings → System → Sound
Select your playback device.
Choose:
Audio Enhancements
Temporarily disable enhancements.
Then test the sound again.
Step 10: Reinstall the Audio Device
If the driver installation has become corrupted:
Open Device Manager.
Right-click your audio device.
Choose:
Uninstall device
Restart the computer.
Windows will normally reinstall the driver automatically during startup.
Step 11: Test Bluetooth Devices
If you normally use Bluetooth headphones or speakers:
- Disconnect them.
- Re-pair the device.
- Remove and add it again if necessary.
- Make sure Windows hasn’t switched back to your laptop speakers.
Bluetooth audio profiles occasionally become corrupted after major Windows updates.
Step 12: Check HDMI Audio
If your monitor has speakers, Windows may automatically switch audio to HDMI.
This often happens after:
- Installing graphics drivers
- Updating Windows
- Connecting another monitor
- Docking a laptop
Simply changing the playback device back to your speakers usually fixes the issue.
Step 13: Run System File Checker
Corrupted Windows files can affect audio services.
Open Terminal (Administrator).
Run:
DISM /Online /Cleanup-Image /RestoreHealth
When complete, run:
sfc /scannow
Restart the PC afterwards.
Step 14: Check BIOS and Firmware Updates
Some manufacturers release firmware updates to improve compatibility with Windows updates.
Use the official update utility from your manufacturer to check for:
- BIOS updates
- Audio firmware
- Chipset updates
- Intel Management Engine updates
Only install updates designed specifically for your device model.
Step 15: Test Another Audio Device
If you’re still unsure whether the problem is software or hardware:
Try:
- USB headphones
- Bluetooth headphones
- External speakers
- A USB sound card
If these work correctly, the internal speakers or audio hardware may require further investigation.
The Best Troubleshooting Order
To save time, work through the fixes in this order:
- Check the volume.
- Select the correct playback device.
- Restart Windows Audio services.
- Run the Playing Audio troubleshooter.
- Check Device Manager.
- Install the manufacturer’s audio driver.
- Roll back a recent driver update.
- Install optional driver updates.
- Disable audio enhancements.
- Reinstall the audio device.
- Test Bluetooth and HDMI audio.
- Run DISM and System File Checker.
- Check BIOS and firmware updates.
- Test alternative speakers or headphones.
Following this sequence resolves the vast majority of Windows 11 audio issues without requiring a full system reset.
When the Problem Might Be Hardware
If you’ve completed every step and still have no sound, the issue could be hardware-related.
Possible causes include:
- Failed laptop speakers
- Damaged headphone jack
- Faulty sound card
- Loose internal speaker connection
- Motherboard faults
- Liquid damage
A professional diagnostic can quickly determine whether the issue is software or hardware.
How Hamilton Group Can Help
If your business relies on Windows devices, audio problems can be more than just an inconvenience. They can disrupt Microsoft Teams meetings, customer calls, webinars and day-to-day productivity.
At Hamilton Group, our engineers diagnose and resolve Windows 11 issues quickly, whether they’re caused by drivers, Windows updates, device policies or failing hardware.
We can help with:
- Windows 11 troubleshooting
- Audio and driver issues
- Microsoft Teams audio problems
- Laptop diagnostics and repairs
- Driver management
- Microsoft Intune device management
- Windows update support
- Business IT support and proactive maintenance
Rather than relying on trial and error, we’ll identify the root cause and get your users back up and running as quickly as possible.
Need Expert Help?
If your Windows 11 PC has lost sound after an update, don’t waste valuable time guessing what’s wrong.
Call Hamilton Group today on 0330 043 0069 or book a call with one of our experts. We’ll diagnose the issue, restore your audio and help keep your business running smoothly.